This lab tackles a fundamental issue in Java programs: the difference between primitive and reference types and how assignment and parameter passing behave with each of these types. The short (and possibly still confusing) story is as follows:
Consider the following tracing tables: each of them has a short method declaration followed by short client code that invokes the method. Carefully complete each tracing table starting from the client code and tracing over the method call and through the method body. Discuss them with the classmate sitting next to you and write down all the answers so that an instructor can check them out. If you encounter any problems or you have any doubts about any of the traces, please make sure you ask an instructor for help.
| Statement | Variable Values | |
|---|---|---|
| private static void test1(int i) { | ||
| i = | ||
| i = i + 1; | ||
| i = | ||
| } | ||
| Start tracing here | ||
| int x = 7; | ||
| x = | ||
| test1(x); | ||
| x = | ||
| Statement | Variable Values | |
|---|---|---|
| private static void test2(String s) { | ||
| s → | ||
| s.toUpperCase(); | ||
| s → | ||
| } | ||
| Start tracing here | ||
| String str1 = "hello"; | ||
| str1 → | ||
| test2(str1); | ||
| str1 → | ||
| Statement | Variable Values | |
|---|---|---|
| private static void test3(NaturalNumber n) { | ||
| n → | ||
| n.increment(); | ||
| n → | ||
| } | ||
| Start tracing here | ||
| NaturalNumber num1 = new NaturalNumber2(17); | ||
| num1 → | ||
| test3(num1); | ||
| num1 → | ||
Follow these steps to set up a project for this lab.
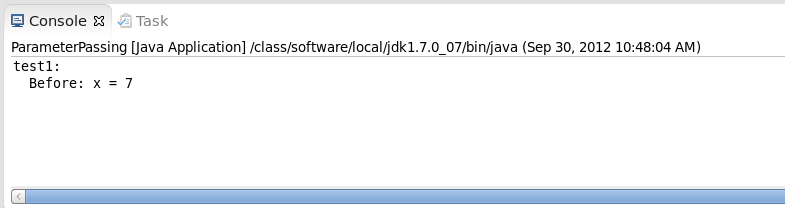
Run the program and compare the output for the first three test method calls (corresponding to the three tracing tables above). Does the observed behavior match the expected behavior from your tracing tables?
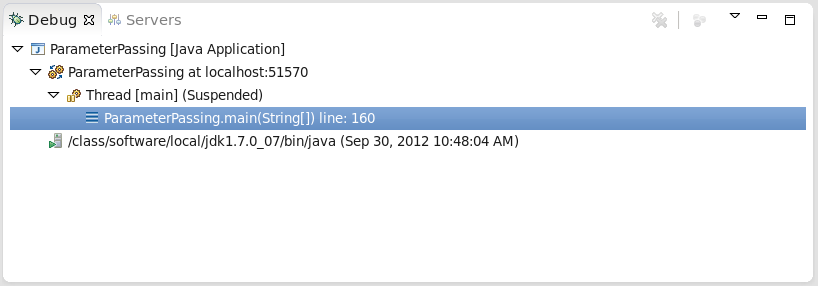
Let's use the Eclipse debugger to follow step-by-step the execution of the first three test methods. Set a breakpoint on the first line of the main method and start the program in the Eclipse debugger (see the debugging lab if you don't remember how to do that).
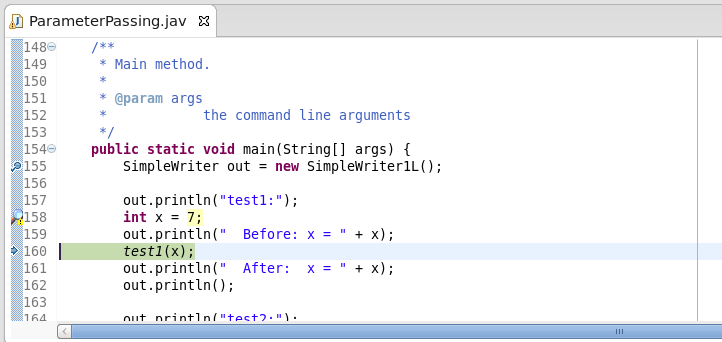
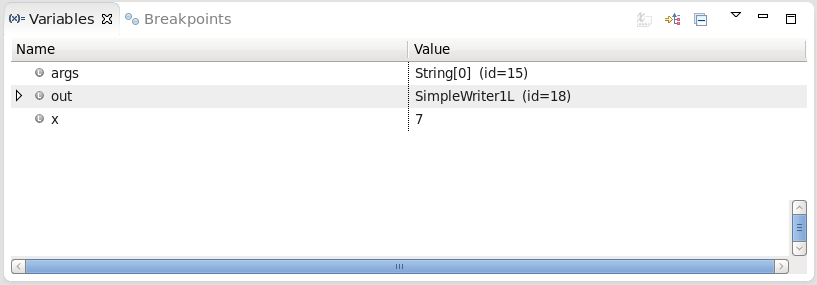
Single-step through the program until you reach the statement invoking test1 , but do not execute the method call yet. Here is what to look for in the debugger perspective at this point in the execution.
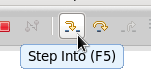
Now we want to track what happens to the parameter inside the test1
method body. Click on the Step Into button in the toolbar at
the top of the perspective.
Note the following:

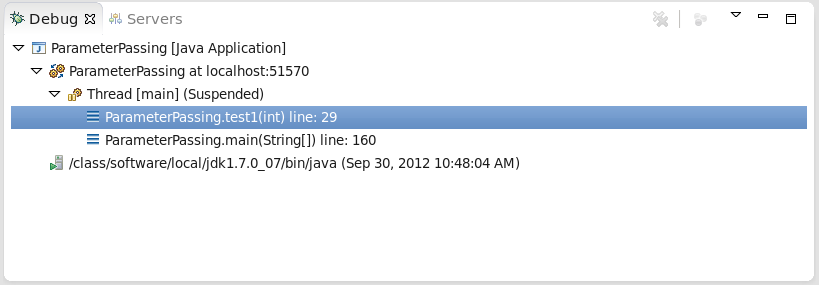
The beauty of the Eclipse debugging perspective (and all
perspectives) is that all the views displayed are kept in sync. In
the Debug view, click on the line ParameterPassing.main(String[])...
and observe what happens in the Console and Variables
views.
As you can see, they
are updated to display the information about the state of the program
back in the main method. If in the Debug view you
click on the line ParameterPassing.test1(int)... , the
various views revert back to showing the state of the program while
inside the call to test1 . This is an extremely useful
feature and one that we can leverage in this lab to keep track of
whether values of variables change and when.
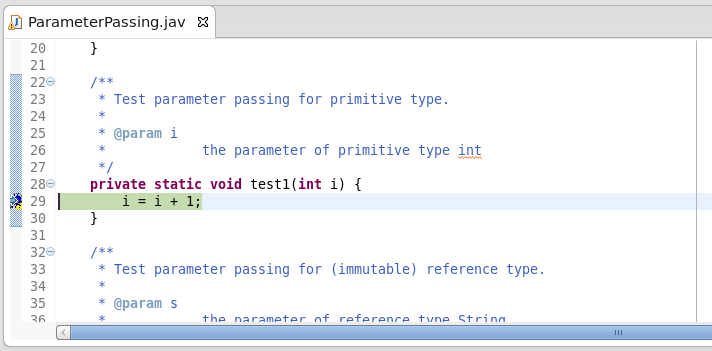
At this stage in the excution, we can see that the value of the argument x passed to method test1 was copied into the formal parameter i and that's why the current value of i is 7.
Step over the assignment statement i = i + 1; in the body of test1 by clicking on the Step Over button in the toolbar. You can see in the Variables view that the value of i is updated to the value 8. However, now click on the line ParameterPassing.main(String[])... in the Debug view and observe that the value of x is still 7.
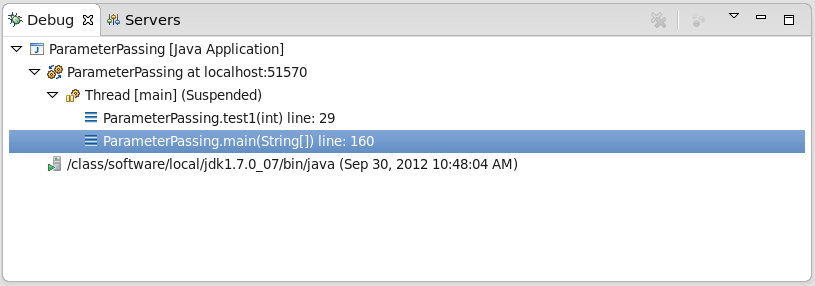
Let's get out of test1 . Click again on the line ParameterPassing.test1(int)...
in the Debug view and then click on the Step Return
button in the toolbar.
This takes us back to the main method just after the call to test1 . Note that the value of x is still 7, so it is clear that the value of the parameter ( i with value 8) has not been copied back into the actual argument. Click Step Over twice to complete the first test.
Let's step through the second test involving String s.
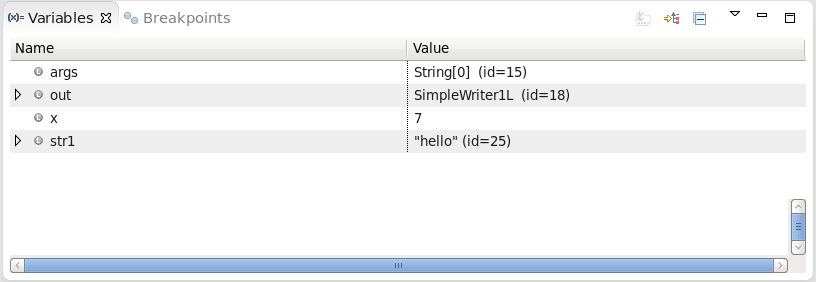
Click Step Over three times to get to the call to the test2
method. Look at the Variables view and note that the String
str1 has the value "hello" . However, because String
is a reference type, Eclipse debugger displays also a numeric
id that uniquely identifies a reference (in the screen shot,
the id for str1 is id=25 ; the id you see may be
different). This id allows us to recognize aliases (i.e., equal
references) because aliased references will have the same id value.
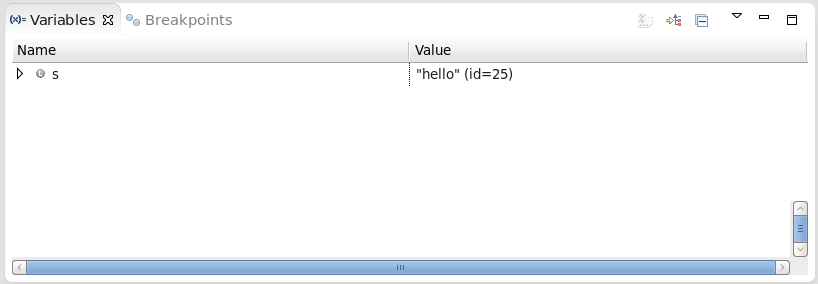
Now let's step into the test2 method by clicking on
the Step Into toolbar button. You can see that the Variables
view is updated to display the only variable in the new scope which
is the formal parameter s . Two things must be noted:
first, the value of the String s is "hello"
and second, the id for s is 25 (in the screen shots), the
same as the id for the actual argument str . This shows
that str and s are aliases, they refer to the same
object whose value is "hello" .
Execute the statement in test2 's body by clicking the Step Over button. You might be surprised by what happens: nothing! The value of s does not change (the id is still the same and the object value is still the same). How is that possible? It turns out that String is an immutable type and that means that there are no methods in the String class that modify the value of the String they are called on. In particular, s.toUpperCase does not modify s ; it creates a new String object with the value of s converted to upper case and returns a reference to that object. The body of test2 simply ignores the value returned by s.toUpperCase (which is probably not something the programmer should do and that's why SpotBugs marks this statement with an appropriate warning).
You can complete this test by clicking Step Return to return to the main method and then clicking Step Over twice. It should not be a surprise that str was not changed by the method call.
Single-step through the next test ( test3 ) and use what you have learned about parameter passing, references, and the Eclipse debugger to see what happens and make sure you understand why. If needed, you should correct your trace and pay particular attention to those steps where the observed behavior differs from what you expected. If you have any question, make sure to ask your instructor.
The program contains several more tests involving more examples of parameter passing. They are meant to help you understand this potentially confusing concept and they give you a chance to test your understanding.
For each of the following tracing tables, first complete the tracing table, and then single-step through the corresponding test to see whether the code behaves as you expected. Any time the observed behavior does not match your expectations, you should stop and try to understand where your trace went wrong. Make sure to ask your instructor for help if you cannot figure it out on your own.
| Statement | Variable Values | |
|---|---|---|
| private static void test4(String s) { | ||
| s → | ||
| s = s.toUpperCase(); | ||
| s → | ||
| } | ||
| Start tracing here | ||
| String str2 = "hello"; | ||
| str2 → | ||
| test4(str2); | ||
| str2 → | ||
| Statement | Variable Values | |
|---|---|---|
| private static void test5(String s) { | ||
| s → | ||
| s = s + ", world!"; | ||
| s → | ||
| } | ||
| Start tracing here | ||
| String str3 = "Hello"; | ||
| str3 → | ||
| test5(str3); | ||
| str3 → | ||
| Statement | Variable Values | |
|---|---|---|
| private static void test6(NaturalNumber n) { | ||
| n → | ||
| n = new NaturalNumber2(n.toString() + "1"); | ||
| n → | ||
| } | ||
| Start tracing here | ||
| NaturalNumber num2 = new NaturalNumber2("17"); | ||
| num2 → | ||
| test6(num2); | ||
| num2 → | ||
| Statement | Variable Values | |
|---|---|---|
| private static void swap1(int i1, int i2) { | ||
| i1 = i2 = |
||
| int tmp = i1; | ||
| i1 = i2 = tmp = |
||
| i1 = i2; | ||
| i1 = i2 = tmp = |
||
| i2 = tmp; | ||
| i1 = i2 = tmp = |
||
| } | ||
| Start tracing here | ||
| int x1 = 5, x2 = 8; | ||
| x1 = x2 = |
||
| swap1(x1, x2); | ||
| x1 = x2 = |
||
| Statement | Variable Values | |
|---|---|---|
| private static void swap2(String s1, String s2) { | ||
| s1 → s2 → |
||
| String tmp = s1; | ||
| s1, tmp → s2 → |
||
| s1 = s2; | ||
| s1, s2 → tmp → |
||
| s2 = tmp; | ||
| s1 → s2, tmp → |
||
| } | ||
| Start tracing here | ||
| String str1 = "legends", str2 = "leaders"; | ||
| str1 → str2 → |
||
| swap2(str1, str2); | ||
| str1 → str2 → |
||
| Statement | Variable Values | |
|---|---|---|
| private static void swap3(NaturalNumber n1, NaturalNumber n2) { | ||
| n1 → n2 → |
||
| NaturalNumber tmp = n1; | ||
| n1, tmp → n2 → |
||
| n1 = n2; | ||
| n1, n2 → tmp → |
||
| n2 = tmp; | ||
| n1 → n2, tmp → |
||
| } | ||
| Start tracing here | ||
| NaturalNumber num1 = new NaturalNumber2(43210), num2 = new NaturalNumber2(24601); | ||
| num1 → num2 → |
||
| swap3(num1, num2); | ||
| num1 → num2 → |
||
For each of the following tracing tables involving arrays, first complete the tracing table, and then single-step through the corresponding test to see whether the code behaves as you expected. Any time the observed behavior does not match your expectations, you should stop and try to understand where your trace went wrong.
| Statement | Variable Values | |
|---|---|---|
| private static void test4(int[] a) { | ||
| a → | ||
| a[0] = a[0] + 1; | ||
| a → | ||
| } | ||
| Start tracing here | ||
| int[] array = { 1, 2, 3 }; | ||
| array → | ||
| test4(array); | ||
| array → | ||
| Statement | Variable Values | |
|---|---|---|
| private static void swap4(int[] a1, int[] a2) { | ||
| a1 → a2 → |
||
| int[] tmp = a1; | ||
| a1, tmp → a2 → |
||
| a1 = a2; | ||
| a1, a2 → tmp → |
||
| a2 = tmp; | ||
| a1 → a2, tmp → |
||
| } | ||
| Start tracing here | ||
| int[] array1 = { 2, 2, 2, 1 }; int[] array2 = { 10, 2, 2012 }; |
||
| array1 → array2 → |
||
| swap4(array1, array2); | ||
| array1 → array2 → |
||