
In this lab you will set up the programming environment for CSE2221/2231 on the CSE Department Windows system.
Every student must complete this setup, even those who plan to use their own computer for the labs and projects. We recommend that you work on this lab with a classmate. Just follow the steps below together making sure you both complete the setup and help each other out when needed.
It is very important that you follow the instructions carefully and pay attention to the details. Make sure you do not skip any steps and that you type all inputs exactly as they are provided in this guide (including spelling and capitalization).
To repeat: follow the steps below very carefully. It is very important that you follow the instructions carefully and pay attention to the details or you may find yourself starting over. Make sure you do not skip any steps and that you type all inputs exactly as they are provided in this guide (including spelling and capitalization).
Before starting Eclipse for the first time on the CSE Windows PCs, there are a couple of items that need to be taken care of. First, you will create a new shortcut for Eclipse that refers to the CSE 2221/2231 installation of Eclipse. Second, you will copy a customized Eclipse workspace to your home drive (U:). A workspace is a folder in which Eclipse stores your programs.
These steps are needed only this one time. After that you will be able to start using Eclipse without further delay. Here are the steps.
S:\CSE\class\CSE22x1\eclipse-current\eclipse.exe
    -showlocation -data U:\workspace
(copy it from here and paste it to
avoid making a mistake when typing it)
22x1 EclipseNote: if there already happens to be a folder called workspace on the U: drive (perhaps from a previous semester), you need to rename it before you can copy the workspace template to U:.
Now that we are done with the setup, go ahead and start Eclipse by double-clicking on the 22x1 Eclipse shortcut on the Windows desktop. You will get a security warning (every time); just click Run.
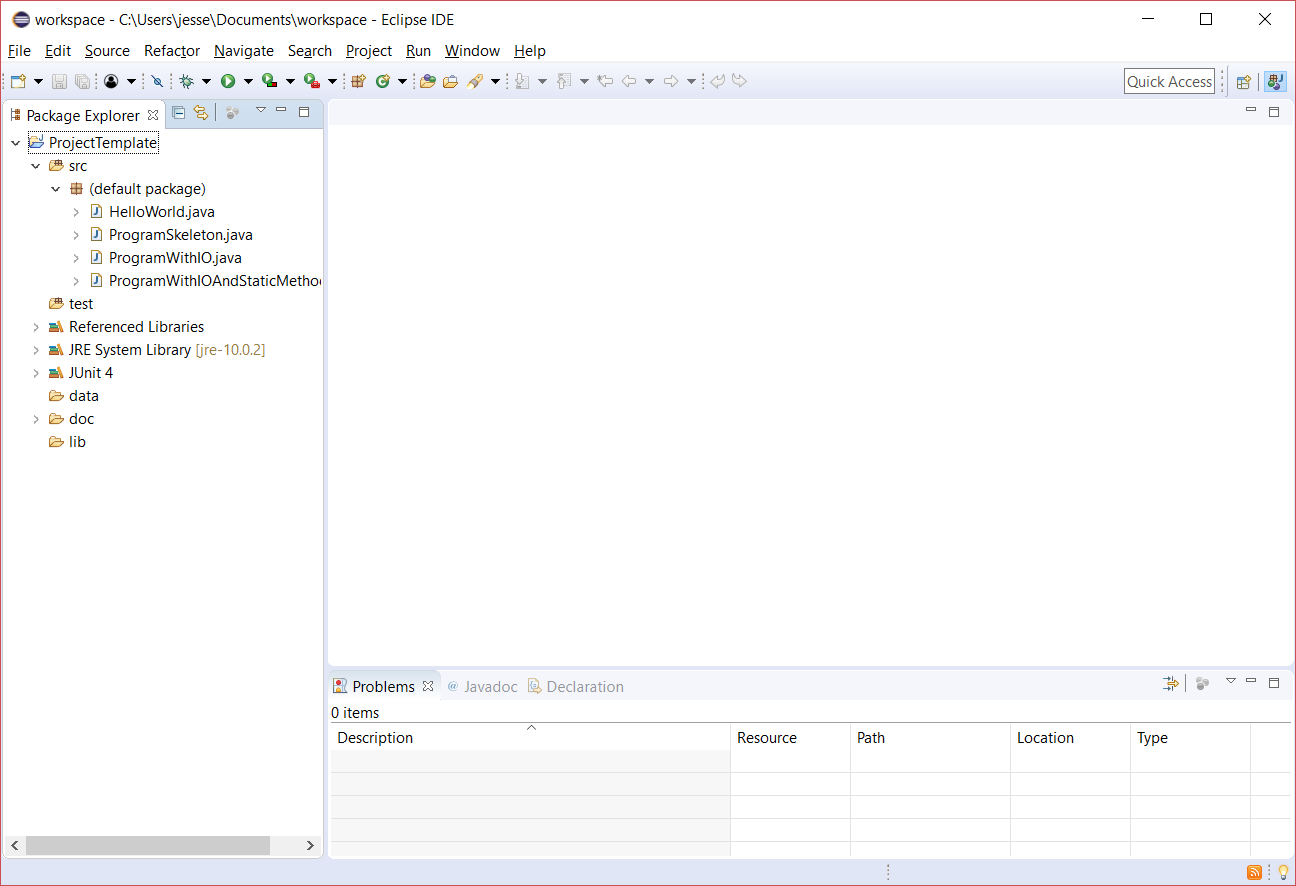
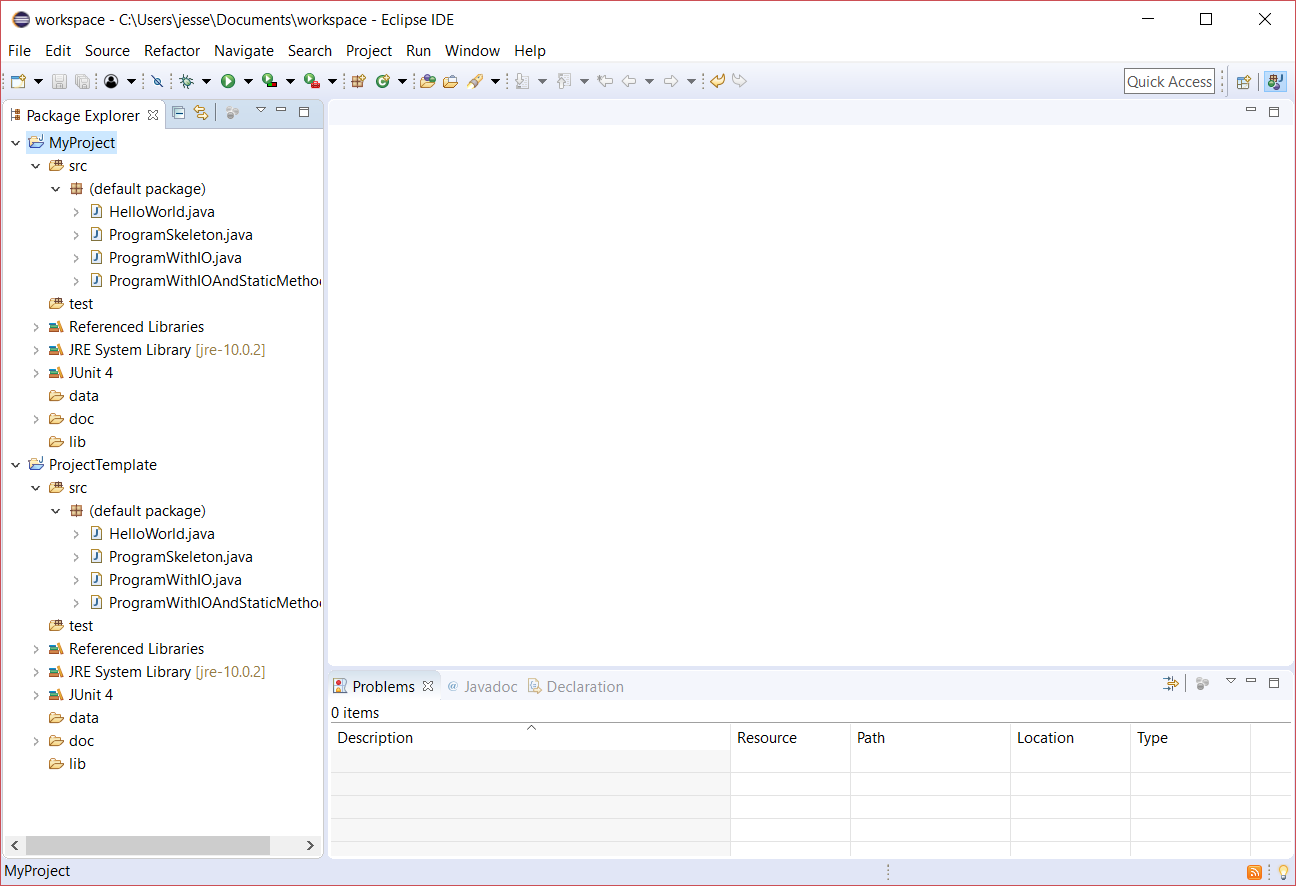
Once Eclipse is finished loading, it will open the Java perspective
shown below. The Eclipse window is always organized according to a perspective.
The current perspective determines the panels (views and editors) that
are displayed in the Eclipse window. The default perspective when
Eclipse is started for the first time is called the Java
perspective which is where you will do most of your programming work
for this class.
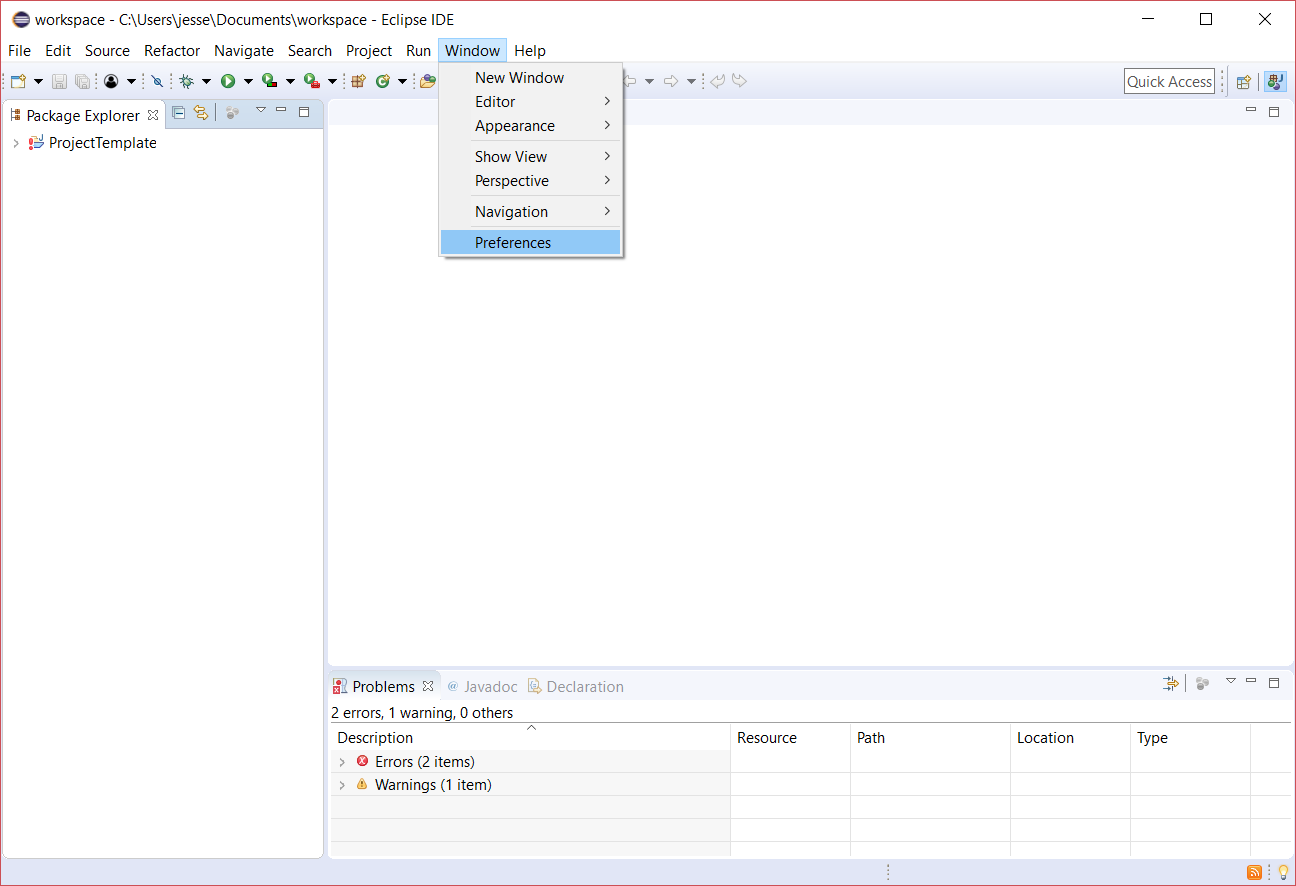
You can take a look around the current window: note the menubar at the top with a variety of menus (File, Edit, Help, etc.), the toolbar below it, and the various panels in the Java perspective (Package Explorer, Problems/Javadoc/Declaration).
VERY IMPORTANT! If at this point you do not see the Project Template folder in the Package Explorer panel on the left (or there happen to be more than one folder), you must stop and call an instructor. Something in the setup did not work as expected and things need to be fixed before you can/should continue.
There is one more thing to do before we can use Eclipse. Access the
preferences window by selecting Preferences from the Window
menu (on Mac OS X, Preferences is under the Eclipse
menu).
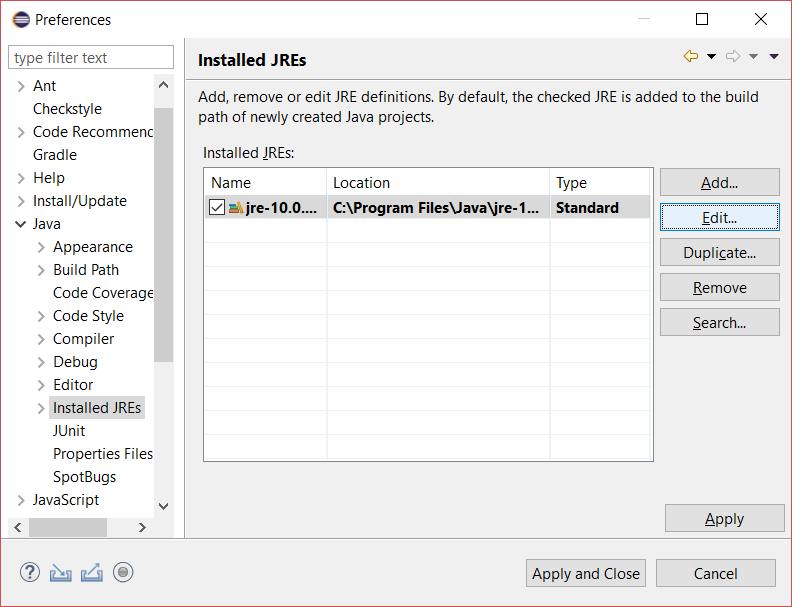
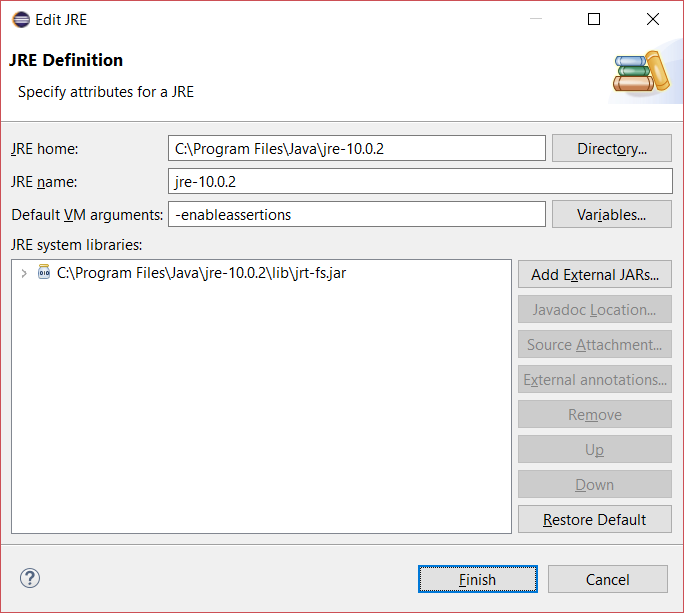
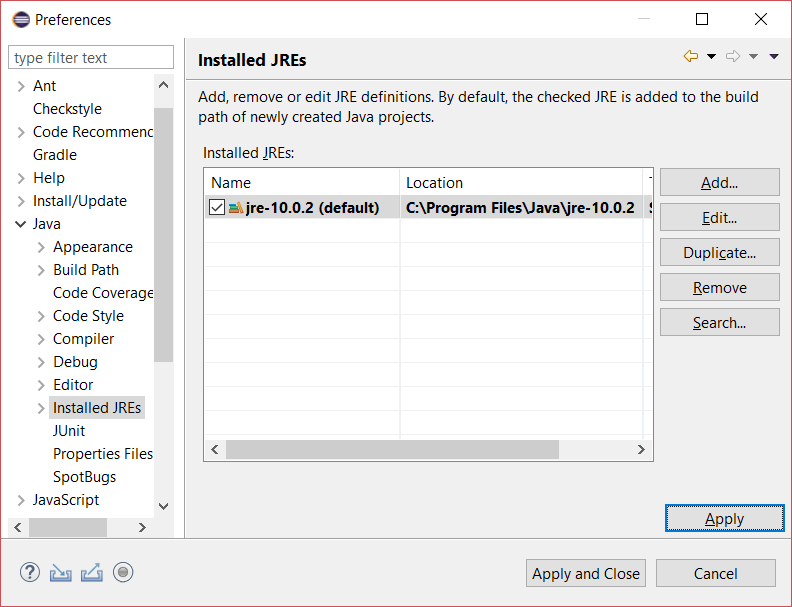
Next select Java > Installed JREs.
Work inside a workspace is organized in projects. A project is essentially a folder (usually inside the workspace folder) where you can store your code, documentation, tests, and all kinds of resources related to a given task.
The workspace already contains a project named ProjectTemplate
as you can see in the Package Explorer view. You can expand a
few entries to see what kind of structure this project has.
Although you can create projects directly in Eclipse, to avoid having to spend time customizing each project, you will create new projects by simply copying and pasting the template in Eclipse any time you need a new project (as explained below).
Important: You should never modify this template project! If you do accidentally modify it, or think you might have done so, you will want to delete the project ProjectTemplate in Eclipse and then download it anew by following these instructions.
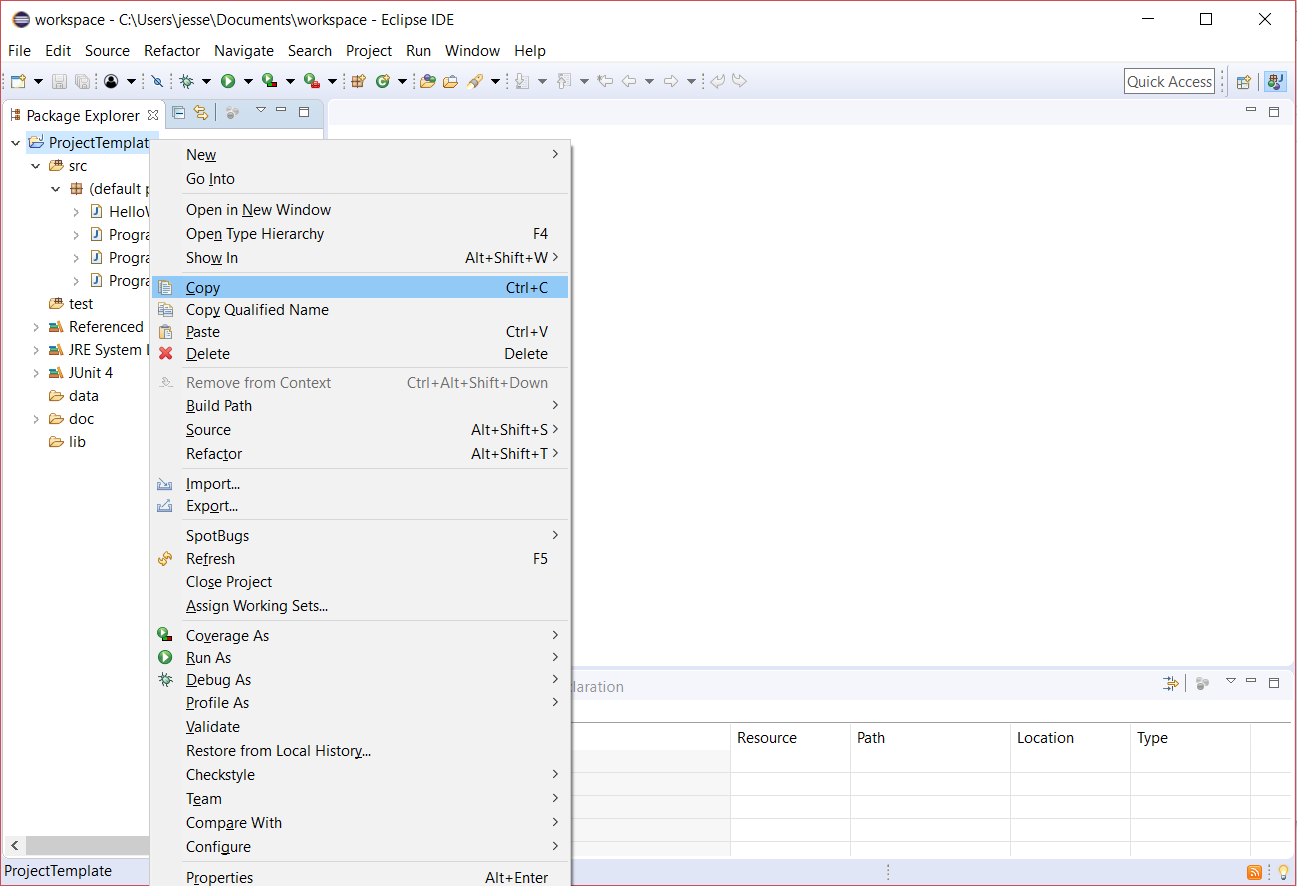
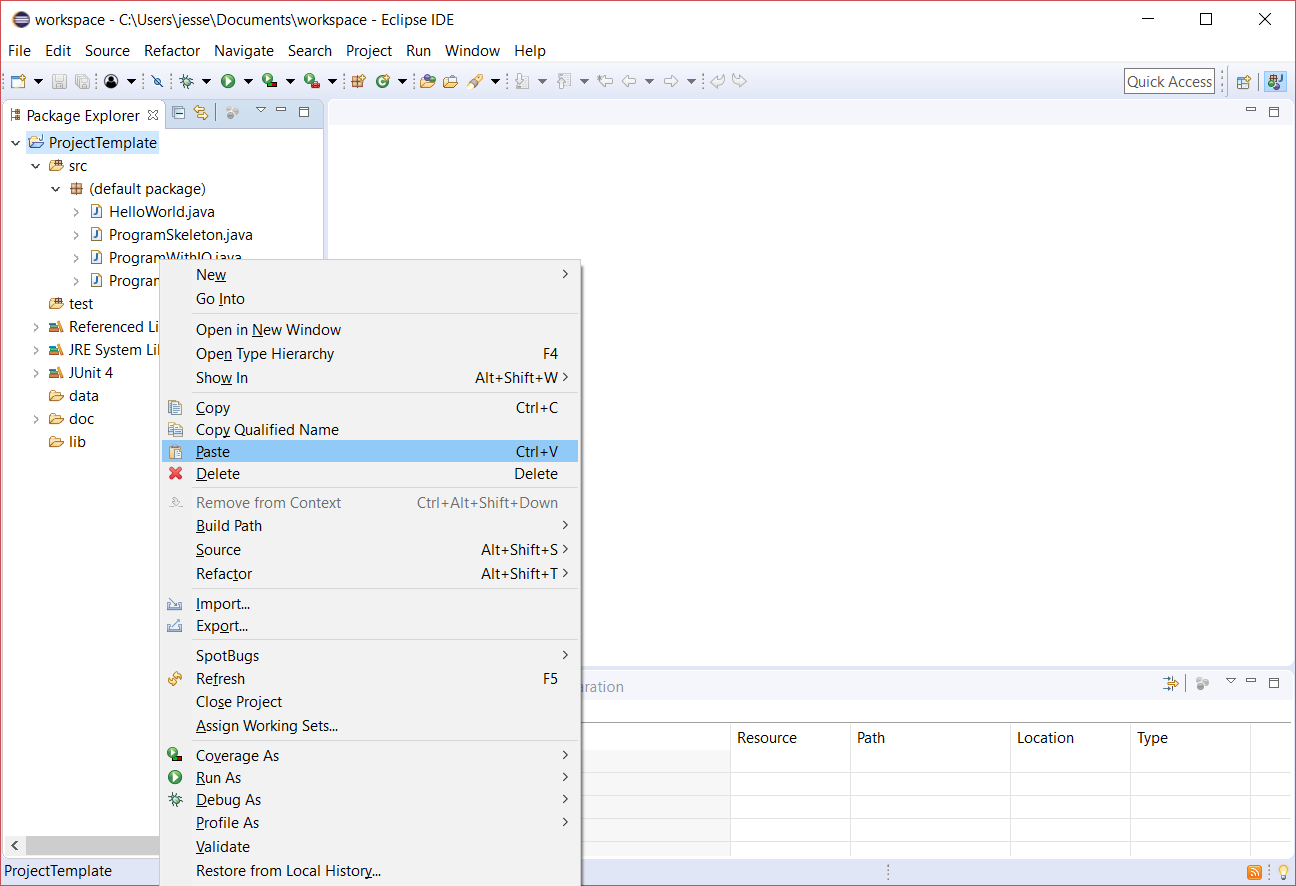
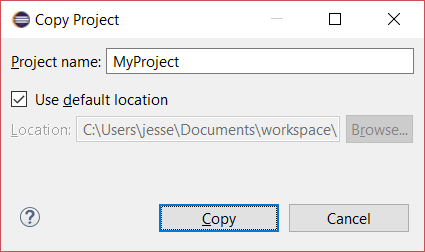
Whenever you need to create a new project, e.g., for a lab or closed lab assignment, you copy and paste ProjectTemplate by following these simple steps:
To try and ensure that computing resources are not wasted (which could result in problems for everyone using the system), please always exit Eclipse by selecting File > Exit from the menubar (instead of just closing the Eclipse window or just logging out of Windows without exiting Eclipse first).
This completes this Eclipse setup guide. Make sure that both you and your partner have completed this guide before the next lab meeting.
Note: If you would like to be able to use Eclipse and access your files remotely from your own computer, see instructions on how to install and use the Citrix Workspace application to connect to a CSE virtual desktop at this link.
If you intend to use Eclipse on your own computer for (some or all) labs and projects, you should follow carefully these instructions to install and set it up.